Learn How to Make Hilo-Style Lei on Hawaiʻi Island
Hawai‘i Island’s Donkey Mill Art Center offers this—and other—lei-making classes throughout the year.

The Donkey Mill Art Center partners with the Kona Coffee Cultural Festival (KCCF) each year, providing free workshops with the purchase of a $5 festival button. Attendees can check out cultural activities that make Hawai‘i unique: natural dye, lauhala weaving, lei making and live demos. Thanks to an invitation by KCCF organizers, I had the opportunity to take a “Lei-Making: Lei Hilo With Flowers” class by instructor Allison Tan.
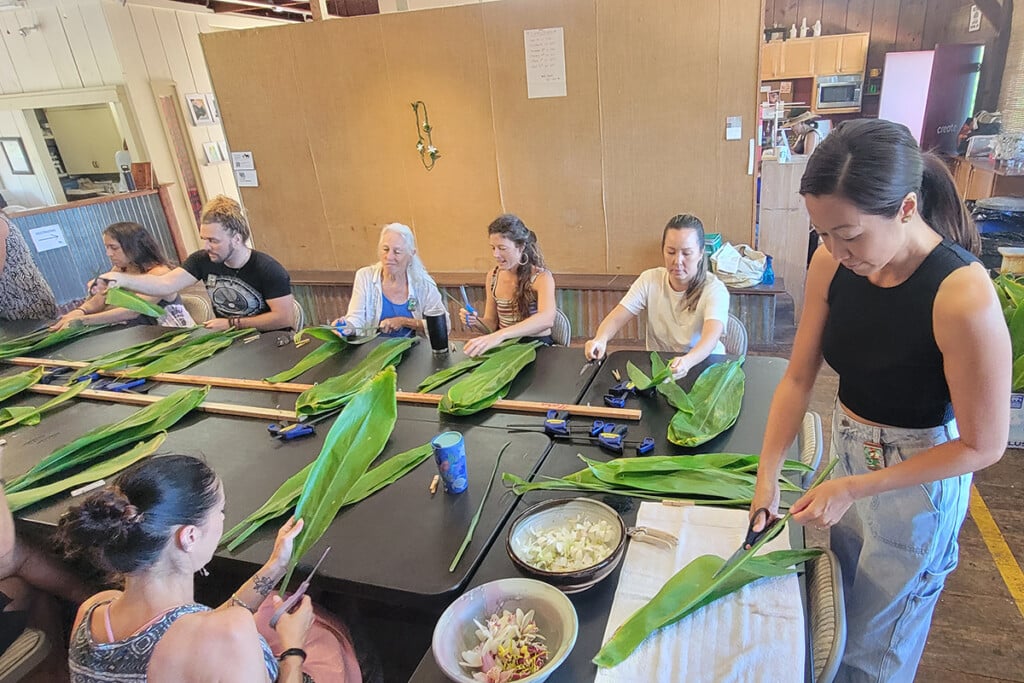
The class explores a popular and convenient lei-making method is known as hilo, which means to twist or braid and is used not only for lei, but in the making cords. By the time I get to Donkey Mill Art center, there are already 10 people sitting at the large wooden table in the middle of the room. It’s a charming place with its open windows, the smell of coffee and baked goods in the next room and quiet conversation from other workshops taking place. Deep in winding roads of Hōlualoa, it’s an artist’s ideal escape.

The Donkey Mill Art Center.
Photo: Maria Kanai
First, we cut fresh tī leaves into strips, removing the “bone” of the leaf using a sharp pair of scissors. In order to form the lei, Tan shares that we need to make the leaves soft and pliable. One way to do this is to iron them to apply heat or even roll the leaves up and microwave them, but most of us choose to iron both sides of the leaves. Tan gives everyone hooks or clamps to keep the leaves in place—although if you grew up here, you may have watched your aunties make them using their toes. We begin the lei by twisting one side of the ti leaf around and then crossing over to the other side before twisting the strands together. It’s important to keep the strands tight as you continue to twist to create one strand. The trickiest part for me is when I would run out of the leaves to work with and needed to add new leaves in for length. It’s simple in concept: you just wrap and twist the new leaf around the old leaf, but my hands and fingers struggled with the movements.
Tan makes her rounds, making sure every student is on track. Miho Morinoue, the program director, gives me some special tricks: “Be sure to twist both sides of the leaves as you go, not just the one that you’re going to cross over. That’s helps give the lei that symmetrical look.”
After we reach the right length for the lei, we tie the ends together and add decorations. All we need to do is to untwist one section, typically the areas where the new ti leaves have been added, and stick a flower in. We even learn how to make ti leaf roses, which is the hardest part of the entire lesson in my opinion. It involves twisting and folding one leaf into itself to create the “center” of the rose, and then folding the rest of the leaf backwards in small sections to create “petals.” It was a fun challenge and it felt great bringing the lei back to my family.

The finished product.
Photo: Maria Kanai
While this class is offered for free because of Donkey Mill Art Center’s partnership with KCCF, it is available throughout the year for a fee, typically around $45. You can also visit the website to see what classes are available throughout the month: drawing classes, DIY screen printing, katazome printing and much more. A stunning exhibit called ‘Āina Speaks Juried Exhibition is also on display through Dec. 16, featuring portraits that capture stories, lives and knowledge of the farmers and community members who work with the land.
Donkey Mill Art Center, 78-6670 Mamalahoa Hwy., Holualoa, donkeymillartcenter.org, @donkeymillartcenter
Don’t forget to vote in our Readers’ Choice Awards! Vote for your favorite hotel, restaurant, hike, beach, poke shop and more! Plus, enter to win a free trip to Hawaiʻi, courtesy of Alaska Airlines and Waimea Plantation Cottages.


